Friday, April 12, 2019

Handwriting the DO's and the DON'Ts

Image result for small pencils


HANDWRITING THE DO’s AND THE DON’Ts 

When kids are first learning to colour you may use jumbo or thick crayons and pencils to begin with. Kids often need less strength and coordination to hold a thicker framed crayon. Toddlers tend to use their entire arm to colour whilst laying on their tummy’s which helps them to start using their fingers instead of their shoulder. Jumbo or thicker framed crayons or what I like to use 'crayon rocks' (see below) are heavier and are more appropriate for younger kids from 1-3 years to make marks on paper.

Image result for crayon rocks
Check it out: https://www.amazon.co.uk/Crayon-Rocks-Colours-Red-Velvet/dp/B002EODQBA

As kids get older and their fine motor skills develop, they begin to use their fingers and wrist more to move a crayon or pencil. This is due to increased shoulder stability which is a natural progression. Generally between the ages of 3 and 4, kids should begin to rest their arm on the table and start using the small muscles in their hand to do the work.  

Kids from 3 years onward should still use a short crayon and pencil so their is less risk of them holding it in an inappropriate grasp- the more space the more room for incorrect positioning. 

Using a golf pencil or shorter pencil enables kids to manipulate the pencil or crayon more easily. This  discourages them from using too many fingers, putting too much force on the pencil and from colouring outside the lines. 


                                                    Image result for short or gold pencils

Kids often have weak muscles in their hands and that is often the most common problem with handwriting issues and not being able to write coherently and easily in an appropriate pencil grip. Kids compensate for this weakness by using as many fingers as possible to hold the pencil. So instead of engaging kids in lengthily pencil tasks maybe mix it up with some fine motor strengthening activities that are often a lot more fun than pencil work! I post hand and finger strengthening activities regularly on my Facebook and Instagram pages @occupationaltherapyabc (see link on right column)

So... what do I recommend kids use for handwriting? 

Below I recommend a few different strategies to promote an appropriate pencil grip. A good place to start is taking a multi-sensory approach which incorporates a more hands on approach. I also recommend a few different crayons that will promote your kids pincer grip, please note regular crayons are also fine! The below can be found on www.learningwithouttears.com
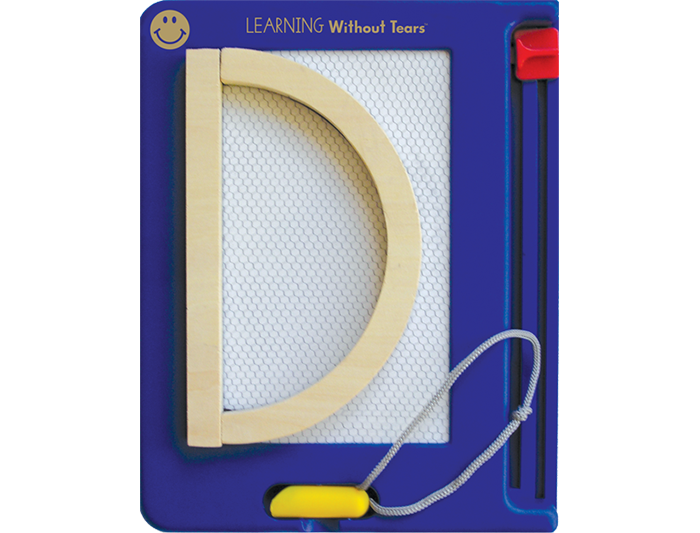
Stamp and See Screen®


Stamp and see screen: Build capitals and numbers using "Wood Piece" stamps. Magnetic, chalk-like writing tool helps develop grip
Check it out:
 https://shopping.lwtears.com/product/SAS/handwriting 


Wood Pieces Set for Capital Letters

Wood pieces set for capital letters
Make pre-writing instruction easy. Children learn capital formations as they imitate the teacher piece by piece. Use the set for teaching size, shape, position words, and concepts, too!
Check it out: 
https://shopping.lwtears.com/product/WP/hwtmultisensory


 FLIP Crayons® Gift Set

Flip crayons are available from Learning without Tears. These are greaat to promote a proper grip and fine motor skills by flipping the crayon. 
Check it out: 
 https://shopping.lwtears.com/product/FGS20/handwriting

What can you do to help your kids pencil grip? 

Engage your kid in strengthening activities examples include theraputty exercises and tennis ball strengthening activities (check out my Instagram page)! Find motivating activities for your kid by getting them to practice colouring their favorite cartoon character (so many free printable material online). 

If your kid refuses point blank to engage in colouring tasks, don’t panic! Colouring is one part of fine motor tasks but fear not there is plenty of activities that can compensate. Although colouring is an important fine motor skill and is important for grasp development and finger strengthening, kids often refuse to colour because of the lack of strength. So maybe start there, help them increase the strength of their muscles instead of jumping into coloring activities that can be quite taxing on their little muscles. Theraputty, Play-doh etc are great for strengthening the muscles in the hands and fingers! In addition, it’s important they have sufficient shoulder stability in order to engage in colouring or handwriting activities. The aim is to get your kid to use their hand without using their whole arm! Encourage your kid to colour or engage in fine motor tasks while lying on their tummy. This can feel uncomfortable at the start but keep at it. 

Roll–A–Dough Letters®

Roll-A-Dough Letters
It's fun to roll and cut dough snakes to make capitals and numbers! Use the blue tray with sand, shaving cream, or rice for additional practice. Set includes: 18 double-sided capital and number cards, tray, and dough.
Check it out: 
https://shopping.lwtears.com/product/RAD/products-by-type 


I really hope this has been helpful! If you have any questions please share them below! 
SHARE:

Thursday, April 11, 2019

Sensory Room on a Budget


Image result for sensory rooms


Creating a cost-efficient sensory room can easily be done when you do your research and know what products are worth buying and will actually make a difference to your kids’ life and development. Unfortunately, many families with loved ones who would benefit from access to a sensory room often don’t feel they have the necessary funds or space to create one. In short for those unaware, a sensory space or room is a special area which combines a range of stimuli to help individuals develop and engage appropriately in their senses. These can include colours, lights, sounds, sensory objects all within a safe environment that often helps kids to regulate and feel calm.

However, the point I want to make today is that you don’t need huge funds or endless space to create a budget friendly sensory place. Here are some tips that I hope will help you out!


             1. Consider what your kid needs 

Every child is wonderfully different and unique and like anything else have different desires and needs therefore the first step in creating a sensory room or space is think about the kid who will actually be using it. The sensory space should meet their particular needs so take note of some of the toys they seek comfort in that might be therapy items ad sensory activities your kiddo enjoys for example does your kid find theraputty or play-doh therapeutic? Does your kid find slow moving lights and noise soothing? Does your kid enjoy playing with fidgets and squishy toys? Does your kids find weight e.g. blankets or vests regulating? Include what your kid already finds beneficial in the sensory space. Speak to your kids therapist if they have one on what your kid likes working on in therapy sessions.

    2.  Finding the right space

I don’t always like the term ‘sensory room’ as it can be misleading. In order to create an efficient and appropriate sensory space often does not involve including an entire room. Most families do not have an entire room in their home in which they can adapt into a sensory room and that’s okay. Smaller sensory areas can be just as effective as bigger ones. I would recommend thinking about any quiet space you do have whether that be a corner in a bedroom or sitting room or playroom. Think about how you can utilise this area and make it individualised for your child. Can you make space if there isn’t already obvious room by moving furniture etc? Maybe there is a wardrobe or furniture you are not using that could be moved to make space for a sensory area? Another idea is to make a sensory tent where your kid has lots of privacy in their sensory space.

   3.  Check out some funding options

Sensory equipment is expensive we all know that but instead of purchasing brand new equipment or products why not do some research online for second hand equipment or charities that might have some more reasonably priced products. In addition, sensory rooms don’t always need to include expensive sensory equipment. Websites like Amazon and eBay often have much cheaper sensory products like sensory lights and toys compared to other websites, it pays to do some research and compare prices.  

Always remember, building a sensory room is a process. Rome was not built in a day nor should your sensory room. Take your time and enjoy the process, add more along the way especially when you start getting a better idea of what your child might enjoy in a sensory room. There is no need to rush it as starting small will allow the sensory space you create to evolve with your kids needs.

         4. Recommendations for a sensory space 

As I have said above all kids are different and all require different inputs to meet their individual needs but here are some recommendations that I think really add to a sensory space.

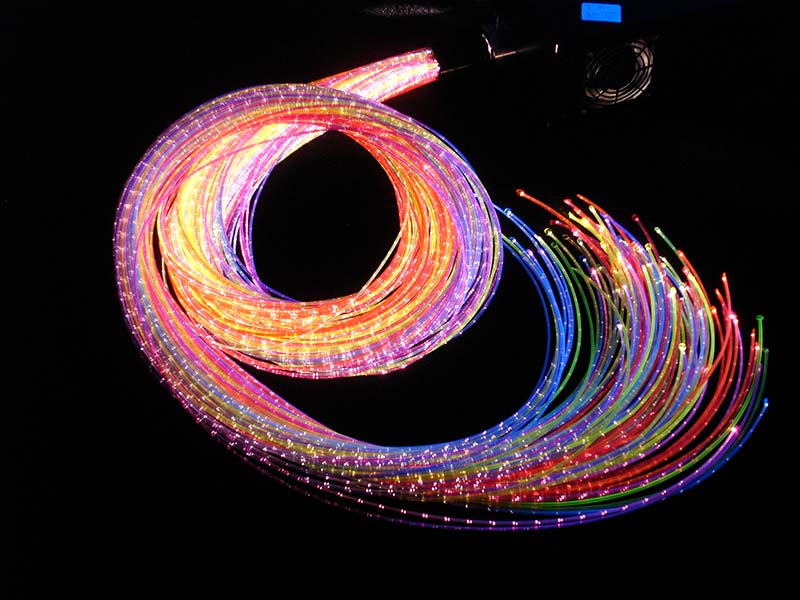
Firstly, I love the idea of a dark space, this can be a room with dark blinds so little sunlight or a dark tent. Sensory lights work well with dark spaces and can be very regulating and soothing for a kid. Lights can come in the form of a bubble tube or fiber optic sensory lighting which is polymer strands that change colour as they light up, these can be used for relaxation, visual and tactile stimulation. Cheaper sensory lights include sensory eggs, disco lights and globes.
Related imageRelated image


I also like to include some comfortable seating in the form of a big squishy bean bag! Kids need to be comfortable in a sensory area to feel completely relaxed and at ease. Bean bags can give input and can be so snug to sit or lie in! I also love a cloud chair which includes vibration combined with music for extra soothing and comfort.
Related image
Image result for crash mats sensory roomI think if you have a big space in particular, make sure that it is lined with crash mats. Firstly for safety as kids often like to roll and tumble as they please. Also its beneficial to include a variety of textures on the floor including a rice path, grass flooring etc.


Fidget toys are also great in sensory rooms as they provide regulation for those sensory seekers.
Image result for fidget toysIf you have extra space ball pools are amazing for tactile, visual, auditory and proprioceptive feedback to help build confidence and strengthen sensory motor skills.


Thanks so much for reading, please leave some comments about sensory spaces below J


SHARE:
Blog Design Created by pipdig